I think they did turn out merry and bright!

Time to get started. I have had my Fiskars cutting board forever. It's one of my best purchases. Here is a photo of the owl punch. I picked mine up at Michaels. The envelopes I used are from Office Max - they are by Divoga and are 6.75" x 3.75". I printed out my invite on card stock using my 1997 version of American greetings CreataCardGold. It's simple and it works. I printed 3 to a sheet.
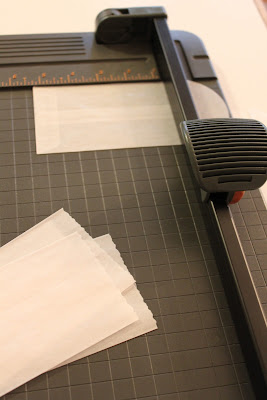
I trimmed the rounded top off of the glassine envelopes using a deckled edge attachment.
I trimmed all my invites out using a straight edge. That piece of book paper is just covering up my address. I don't know about you but I really don't need any new stalkers in my life. Been there - done that - and it's not fun!
Slide the invite in the glassine envelope. Note - the invite is longer than the envelope so it sticks out a bit. This is the Fiskars deckled edge attachment.
Owls and sequins dried overnight. I picked out sequins that I thought looked like the colors of anodized tin. Needed to add some kind of vintage flair.
Tie one on.
I knotted some of them in back and then just trimmed the ties. Others I wrapped around and then to the front and trimmed the ties. Works either way.
For the past few years we have been having an anonymous charity donation. This year it is for Gleaner's Food Bank.
Oh - you can see the owls better here. I punched them out using Bazill paper. Just one more tip - when you go to mail any invite or card that might stick out a bit or be delicate take them to the post office and ask them to hand cancel the stamp. It is no extra charge and then your invite won't have to go through the machinery and maybe get smushed or damaged.
Hope you like and that I described it well enough that you might try it yourself!


Oh I love them! I would love to get an invite like that!! You are so talented and creative Lynda! I just love stopping by here for inspiration!!
ReplyDeletePolly
Again, I am wondering why you don't have an Etsy shop? You are just way to talented to keep it all to yourself and a shop would be a huge success.... these would sell like hot cakes!!!
ReplyDeleteThese are so beautiful. You are so talented!!
ReplyDeleteAshlyn
Beautiful work, I lake it Lynda!
ReplyDeleteNice weekend and kiss.
Love them Lynda...in fact loved them so much that I blogged about your wonderful creations..hope that is ok.
ReplyDeletexx - CB
So pretty!! Would make my day to get one of those in the mail! would you mind sharing the fonts?
ReplyDeleteThese are gorgeous! wow, what a fun invite to receive in the mail! :)
ReplyDeleteThose turned out so cute!!
ReplyDeleteWhen the invitation is that pretty you know the party is going to be great. It looks like you really enjoyed the process of creating them too.
ReplyDeleteThey turned out great! Gorgeous.
ReplyDelete...That owl is adorable!......What glue did you use to attach the sequins I read the other tutorial but didn't see the type?..Your paper flowers are stunning I really want to try the cream one!...gorgeous!...I may do that for wrapped present toppers as this year I am only using brown wrapping paper!...
ReplyDeleteThanks for the inspiration!
I love this tutorial! Super cute, especially the owls!!!
ReplyDeleteLynda,
ReplyDeleteSorry for being so late to see this latest creation of yours, which I have to say may be your best! These are just incredible!
As it's now Sunday morning and your party has already happened, I'm now dying to hear how it went? ;)