


Dark Horse Brewing Company
Random Post: Whippet Love \ Her New Rockin' Doggie Letter Dog Tag \ Mimi Green Dog Collars and Leashes \ BBQ \ Beer \ Friends \ Pants
Hello!
It's hard to believe another week has slipped by.
I went to a nice BBQ at my neighbors last week. His name is Hans and he makes the BEST ribs ever. He really needs to open up The Swedish Ribshack. He uses a dry rub, and they are amazing. His youngest lives in Sweden and was home for a visit - he shared with me photos from his trip to South Africa. He worked at a wildlife park for 2 weeks so lots of Cheetah pics. They were stunning photos.
Saturday I went with my sister to a beer festival in Ypsilanti. So much fun. You receive tokens, and trade them in for tastes. I'm no beer expert, but I always like the beers from Dark Horse Brewing Company in Marshall MI. They had 99 different beers to choose from. I had all my tastes except one from there. I got the lone other taste from Bells - it was Bell's Blacknote.
The Dark Horse beer names I tried (they are fun names so why not share) :
Whatsupwiththemonkey Blueberry Ale
Perkulator coffee Dopplebock - Oh so good!
The Mighty Peach Basil Ale
Where The Wild Things Macerate Raspberries Sour Ale
Bourbon Barrel Plead The Fifth Imperial Stout - LOVED! Had 2.
Last year they had one named What's Up Doc - It was a carrot cake beer - it was my favorite last year.
On to more dog things ...
As you might know our dog is pretty special around here.
I just got her a new ID tag, and it's cute enough to share.

Rockin' Doggie - I'm loving their alphabet tags - 3 sizes - many colors - solid or glitter. We went with the purple glitter in the medium size. Noah picked out her polka dot collar at the local pet store.

Closer view. With my love of letters I'm finding it perfect.

While looking up the tags I ran across another collar I really like, and some neat hooks you can use on your collar so you can switch your tag easily from one collar to the next. I'm thinking if I was going to buy more tags I would buy them at this website - http://www.shopmimigreen.com/
Here are a few reasons -

Rosa Oilcloth Collar

Velvet Collars

Rubits tag holders - clip them to your dogs collar - slip on their tag - then it's really easy to change their ID from one collar to another. I know I always have the hardest time sliding GG's tag onto that holder on her collar. I'm really liking this idea.

Lastly, really nice leashes.
So many happy prints to choose from.
Yesterday I had lunch with one of my friends. Went shopping at the GAP which I haven't done in ages. Bought some funky pants. Why not!

printed skinny mini skimmer khakis
I think the shoes they put with them are horrible. I'm going flip flops :)
Today is more shuttling N to basketball camp, and later dinner with more of my friends. FUN!
Hope all is well.
crafts
Tutorial: Turn A Storebought Memory Foam Mat For Your Dog's Crate Into Something Stylish For Your Home
I just might have a problem.
:)
I like things to look good to my eyes, and sometimes when you want pretty you just have to create it yourself. My Whippet, Guinness, likes to be comfy so I wanted to add some extra cushion to her kennel. I always find it surprising when you go into one of the pet supply stores how very unappealing their pet beds are. Do people really want to put this stuff into their homes? I think we can often just settle with what is there, and figure that is what it is supposed to look like. For me, I just can't do it. When you see the before of the bed hopefully you will really like the after. Now I'm thinking - why not spray paint the kennel itself. That black metal isn't very exciting either.
I caved and bought an orthopedic type cushion for the bottom of the kennel. Nothing pretty about it.
It's dimensions: 35L 22 w 2.5 deep
Then went around my house to see what fabrics I could use to disguise it.
I used some feedsack material from a Decor Sales sale. (See previous post)
I also used some floral material, and a velvety stripe that I bought on clearance years ago.
So, I made this up by the seat of my pants. Here are my main measurements ...
I cut 2 main pieces out of the the feedsack fabric 37 by 26 1/2 inches. I cut everything so it would be roomy, and even though I pre-washed the fabric I figure there may still be some shrinking in the future.
I cut my side pieces 4" deep. I used feedsack on 3 sides, and the stripe on one. I like to mix up colors when I wear clothes and accessories so why not on the bed too!
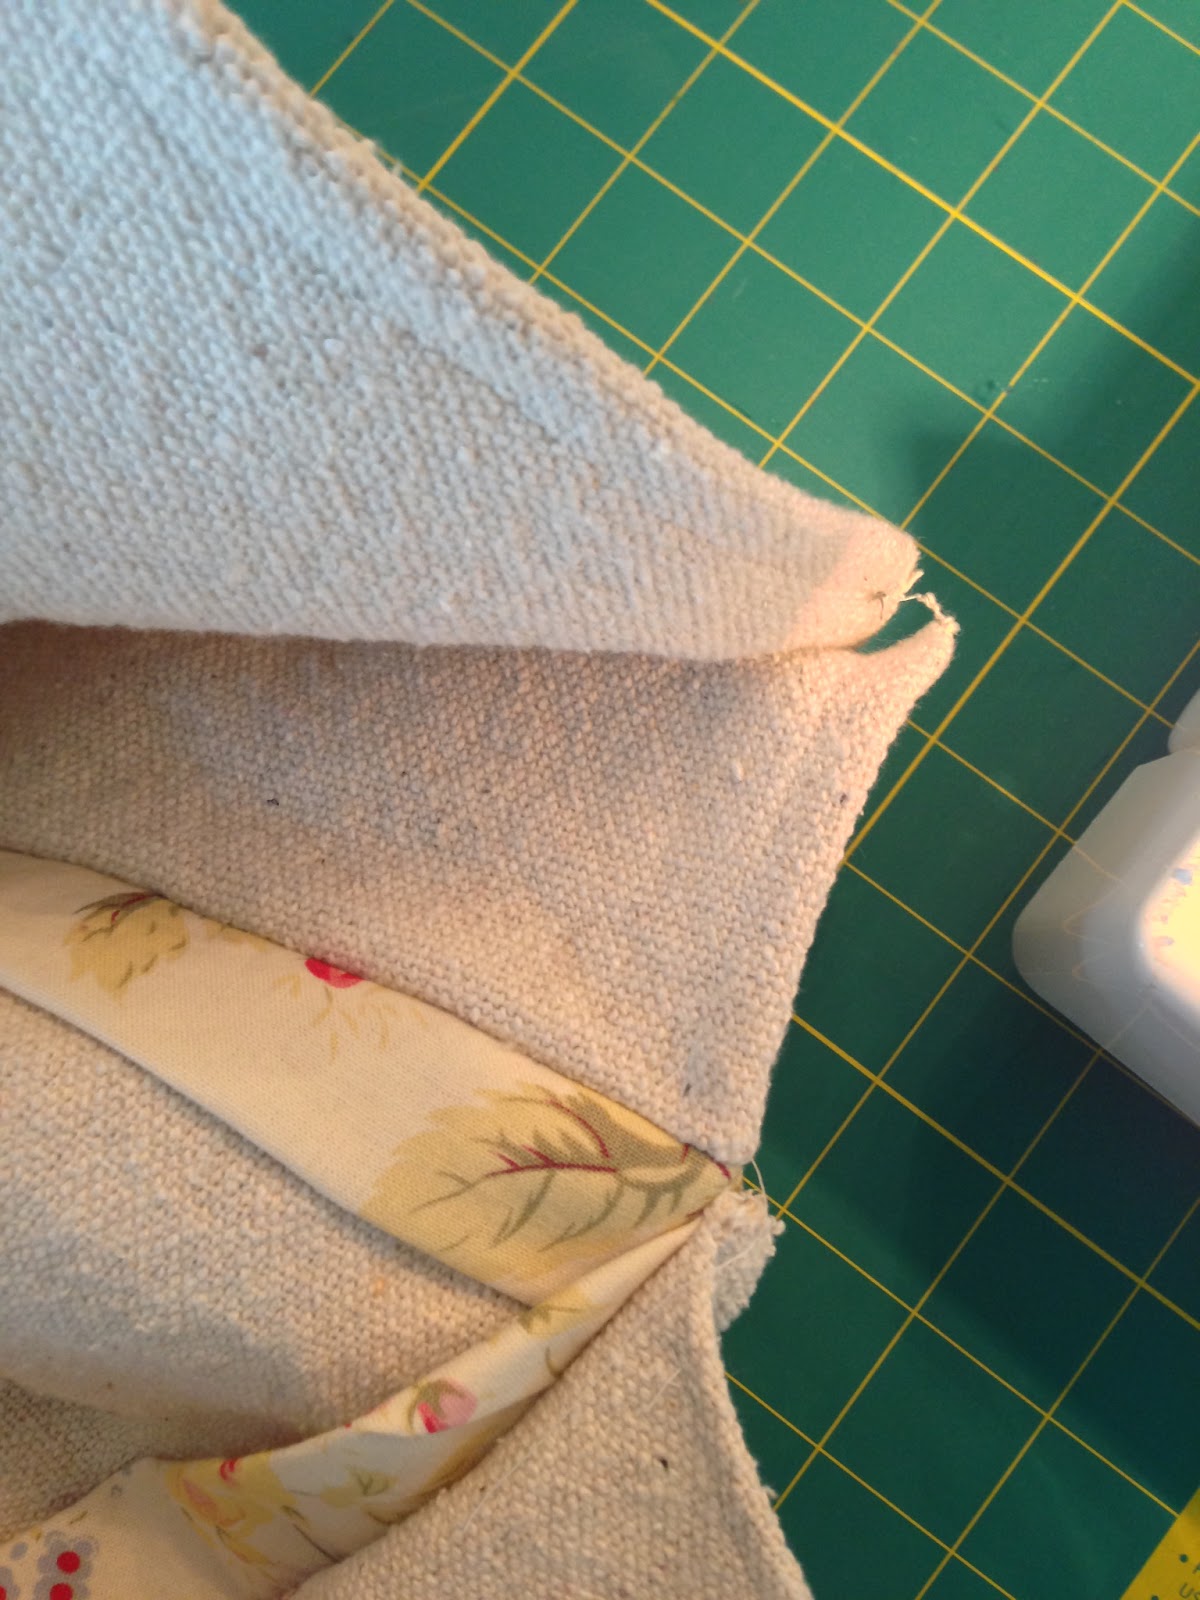
I cut pieces out of the floral fabric to make some flange welting - I cut those pieces 3" wide.

To sew the bed:
fold flange fabric in half - wrong sides facing in.
tuck the flange in between your top and side piece.
You want your top and side pieces to have the good side facing in.

(flange folded in half)

(this is what it will look like when you unfold it)

(this is how I made the corners of each flange look - it's a dog cover so I wasn't too picky)

(here is a side sewn up)
I first attached all of the sides to the top, and then I attached the bottom piece.

Pinning each area together as you go keeps everything straight.

I left one side of the cover open so I could slip the bed inside. To secure it shut I used iron on Velcro. That is what the long tan stripe is. It tucks itself around the end of the bed, and secures itself inside the bed so it's hidden. So far so good - she has not eaten the bed.
Note: Before I made a cover for the pad she did tear apart another bed just like this. Had a big shredding party while I was out. When I brought it home she did grab it and run through the house with all of it's giantness. She thought it was a toy. I guess I should have known better, and been faster in making this cover.

Here is the original bed in all of it's furry brown glory.

Ahhhh, and now.

My Punky Brewster blue stripe moment.


She loves to just let herself into her kennel throughout the day, and with this new cushy layer I find her in there more and more often. I like that the new look blends with what we already have in our home.
We finally have a little sunshine here in the burbs of Metro Detroit! We are also getting a little warm weather today along with some rain showers. With how cold, rainy, and gray it has been I will take it!
Yesterday I went with Noah, and he is all signed up for his High School classes. Crazy! He had his first baseball game of the season Saturday. It rained, snowed. I wasn't there, but heard of his mad skills! Other than that he was Mr. Social with visits to two of his buddies homes with a handful of friends at each. He is always up for anything. My Josh just kind of hung around this weekend. Sometimes he just likes his peaceful time away from school. He had a busy week last week with workouts and segment 2 of drivers training so I think he just wanted to decompress.
I decided to take a few pictures of our front room this morning since it is nice out, and I have light.
Here it is. It's not perfect, but it is home.


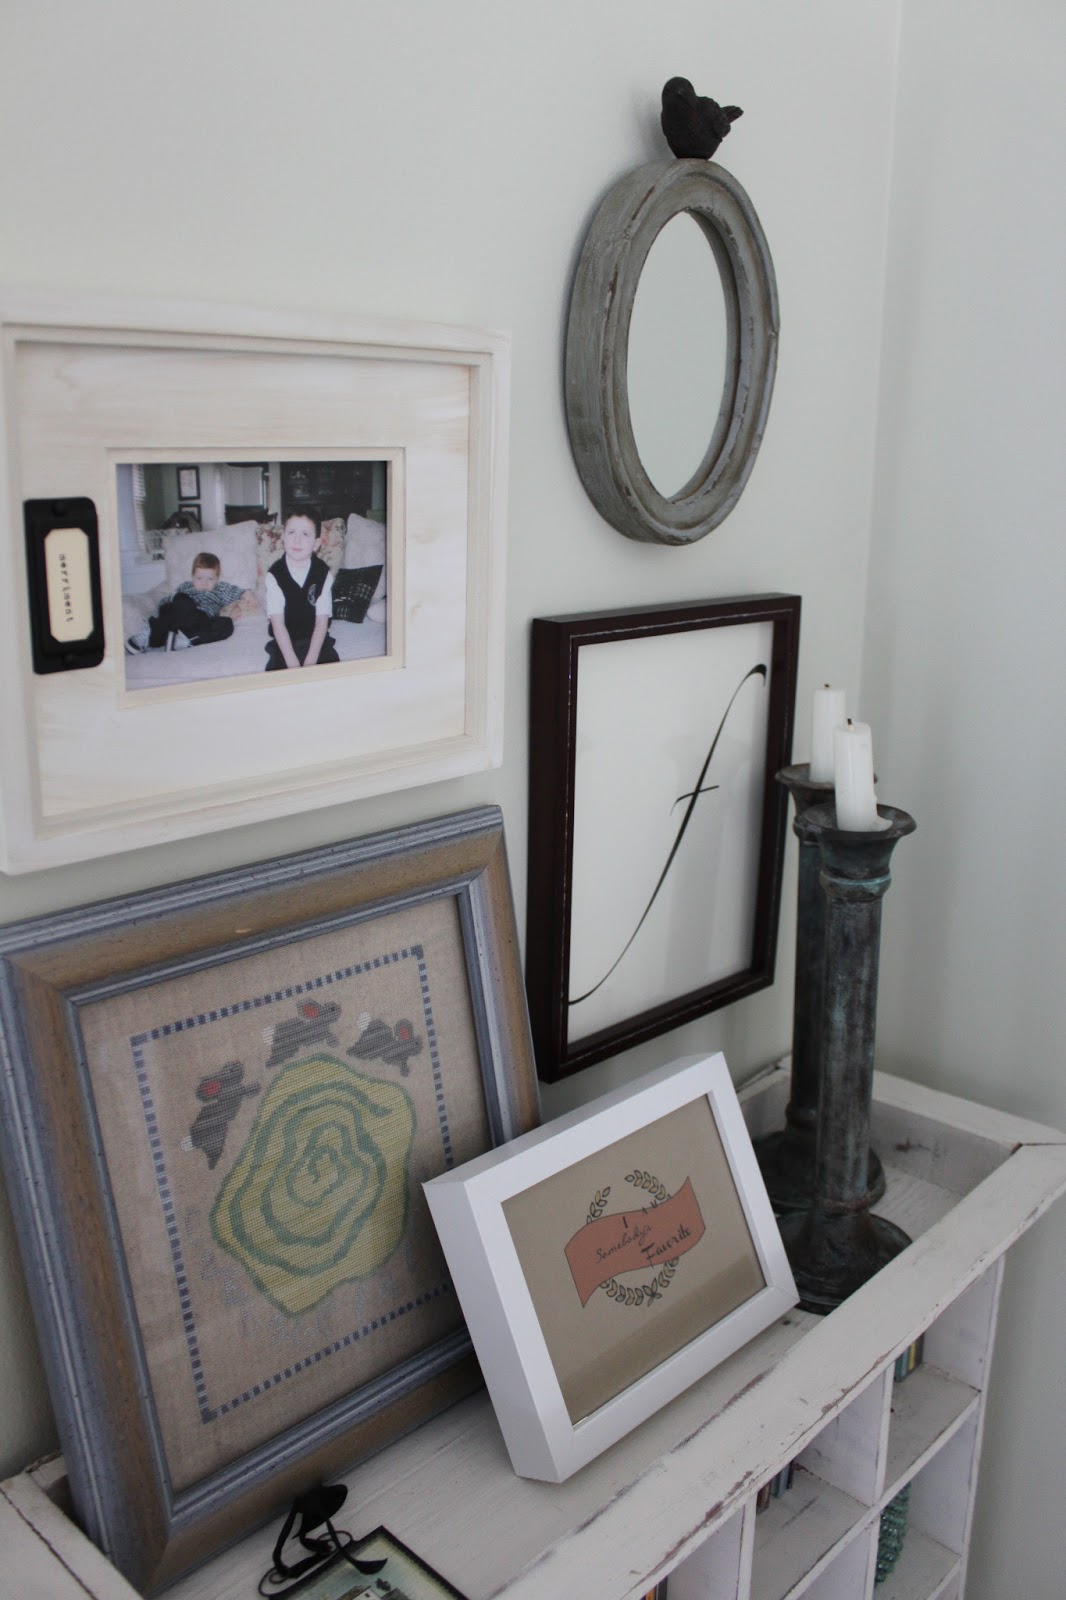


This room is the spot in the house we go to and read and relax.

It's one of this little monsters favorite places to rest and look out the window as well. She truly thinks she owns this chair!
Well, I am going to head out now, and enjoy this day before the rain comes.
As always, thank you for visiting and reading :)

Hello. If you haven't met her before this is my dog - Guinness. She is a Whippet. Speedy outside - a big cozy cat inside. Not a heavy coat of fur to keep her warm, and she seriously loves her neckwarmers in the Winter. I know - it's funny.

Last week I decided to knit her a new one. It blends right in with her fur. Now before I lose you note that this is pretty enough to wear as a human. Of course you would just make the cowl larger. You could also just make the flowers, and attach them to a tote or whatever you wish.

Since it the color was so simple I decided it needed a flower. This is how I made it. Ripped up some drop cloth - that is the bottom layer. Ripped up some cream muslin - second layer. Ripped up some white muslin - that is the top layer. I know they aren't cream or white, right. I wanted the muslin to be a color, and decided grape juice stains so I poured some out, and tossed the muslin strips in. In just a few minutes the cream turned a dusty pink, and the white a nice lavender. I washed them well with dish soap, and let them air dry. My plan worked perfectly - they were just the colors I was after.

I used a needle and thread to stitch everything together at the center, and then wrapped the thread around to cinch the fabrics.

Then I decided why not a pom-pom for the center. My greatest memory of pom-poms while growing up was the time I was in the backyard feeding the geese. One thought the white poms on the back of my socks were white pieces of bread, and kept trying to eat them. It was determined!

After I attached the pom to the second strip I sewed both strips together at the center. I then attached it to the "snood" aka neckwarmer. On the inside I put a little square of dropcloth so I could sew into that, and it would be securely attached.


So, here is Miss GiGi in her new cozy snood. That's the official dog apparel term :) One of the odd things you learn when getting a Whippet. You can see in the background I'm working on painting a chair. It's time to go upstairs and flip it over so I can work on the legs.
Thank you for reading!
Linking to Jennifer Rizzo's pom-pom party & Tuesday's Treasures at My Uncommon Slice Of Suburbia.
Linking to Jennifer Rizzo's pom-pom party & Tuesday's Treasures at My Uncommon Slice Of Suburbia.


